Part 4: Creating the contract
Up to this point, your web application used a pre-deployed smart contract to manage tokens. In this section, you create and deploy your own smart contract to control your own tokens. Creating your own smart contract allows you to customize the tokens and their behavior, such as their metadata, how they are minted, transferred, and burned, and the rules for creating, transferring, and destroying them.
The contract that you create in this section is written in the SmartPy language, which is a language for contracts based on Python. For more information about SmartPy, see SmartPy in this documentation or the complete documentation for SmartPy.
The SmartPy FA2 library
SmartPy provides a library that helps you create FA2-compatible token contracts. Instead of having to write all of the code yourself, you can import code from the FA2 library that controls how the contract and its tokens behave. Then you can customize the behavior and run tests to verify that your contract works before you deploy it.
For more information about the SmartPy FA2 library, see FA2 Lib in the SmartPy documentation.
Loading a template in the SmartPy online IDE
You can work with SmartPy contracts in any text or code editor, but an easy way to with with contracts without installing anything is to use the SmartPy online IDE. This IDE includes templates for smart contracts and can compile, test, and deploy contracts directly in the browser.
Follow these steps to create a contract using a template for FA2 NFTs:
-
Open the SmartPy online IDE at https://smartpy.io/ide.
-
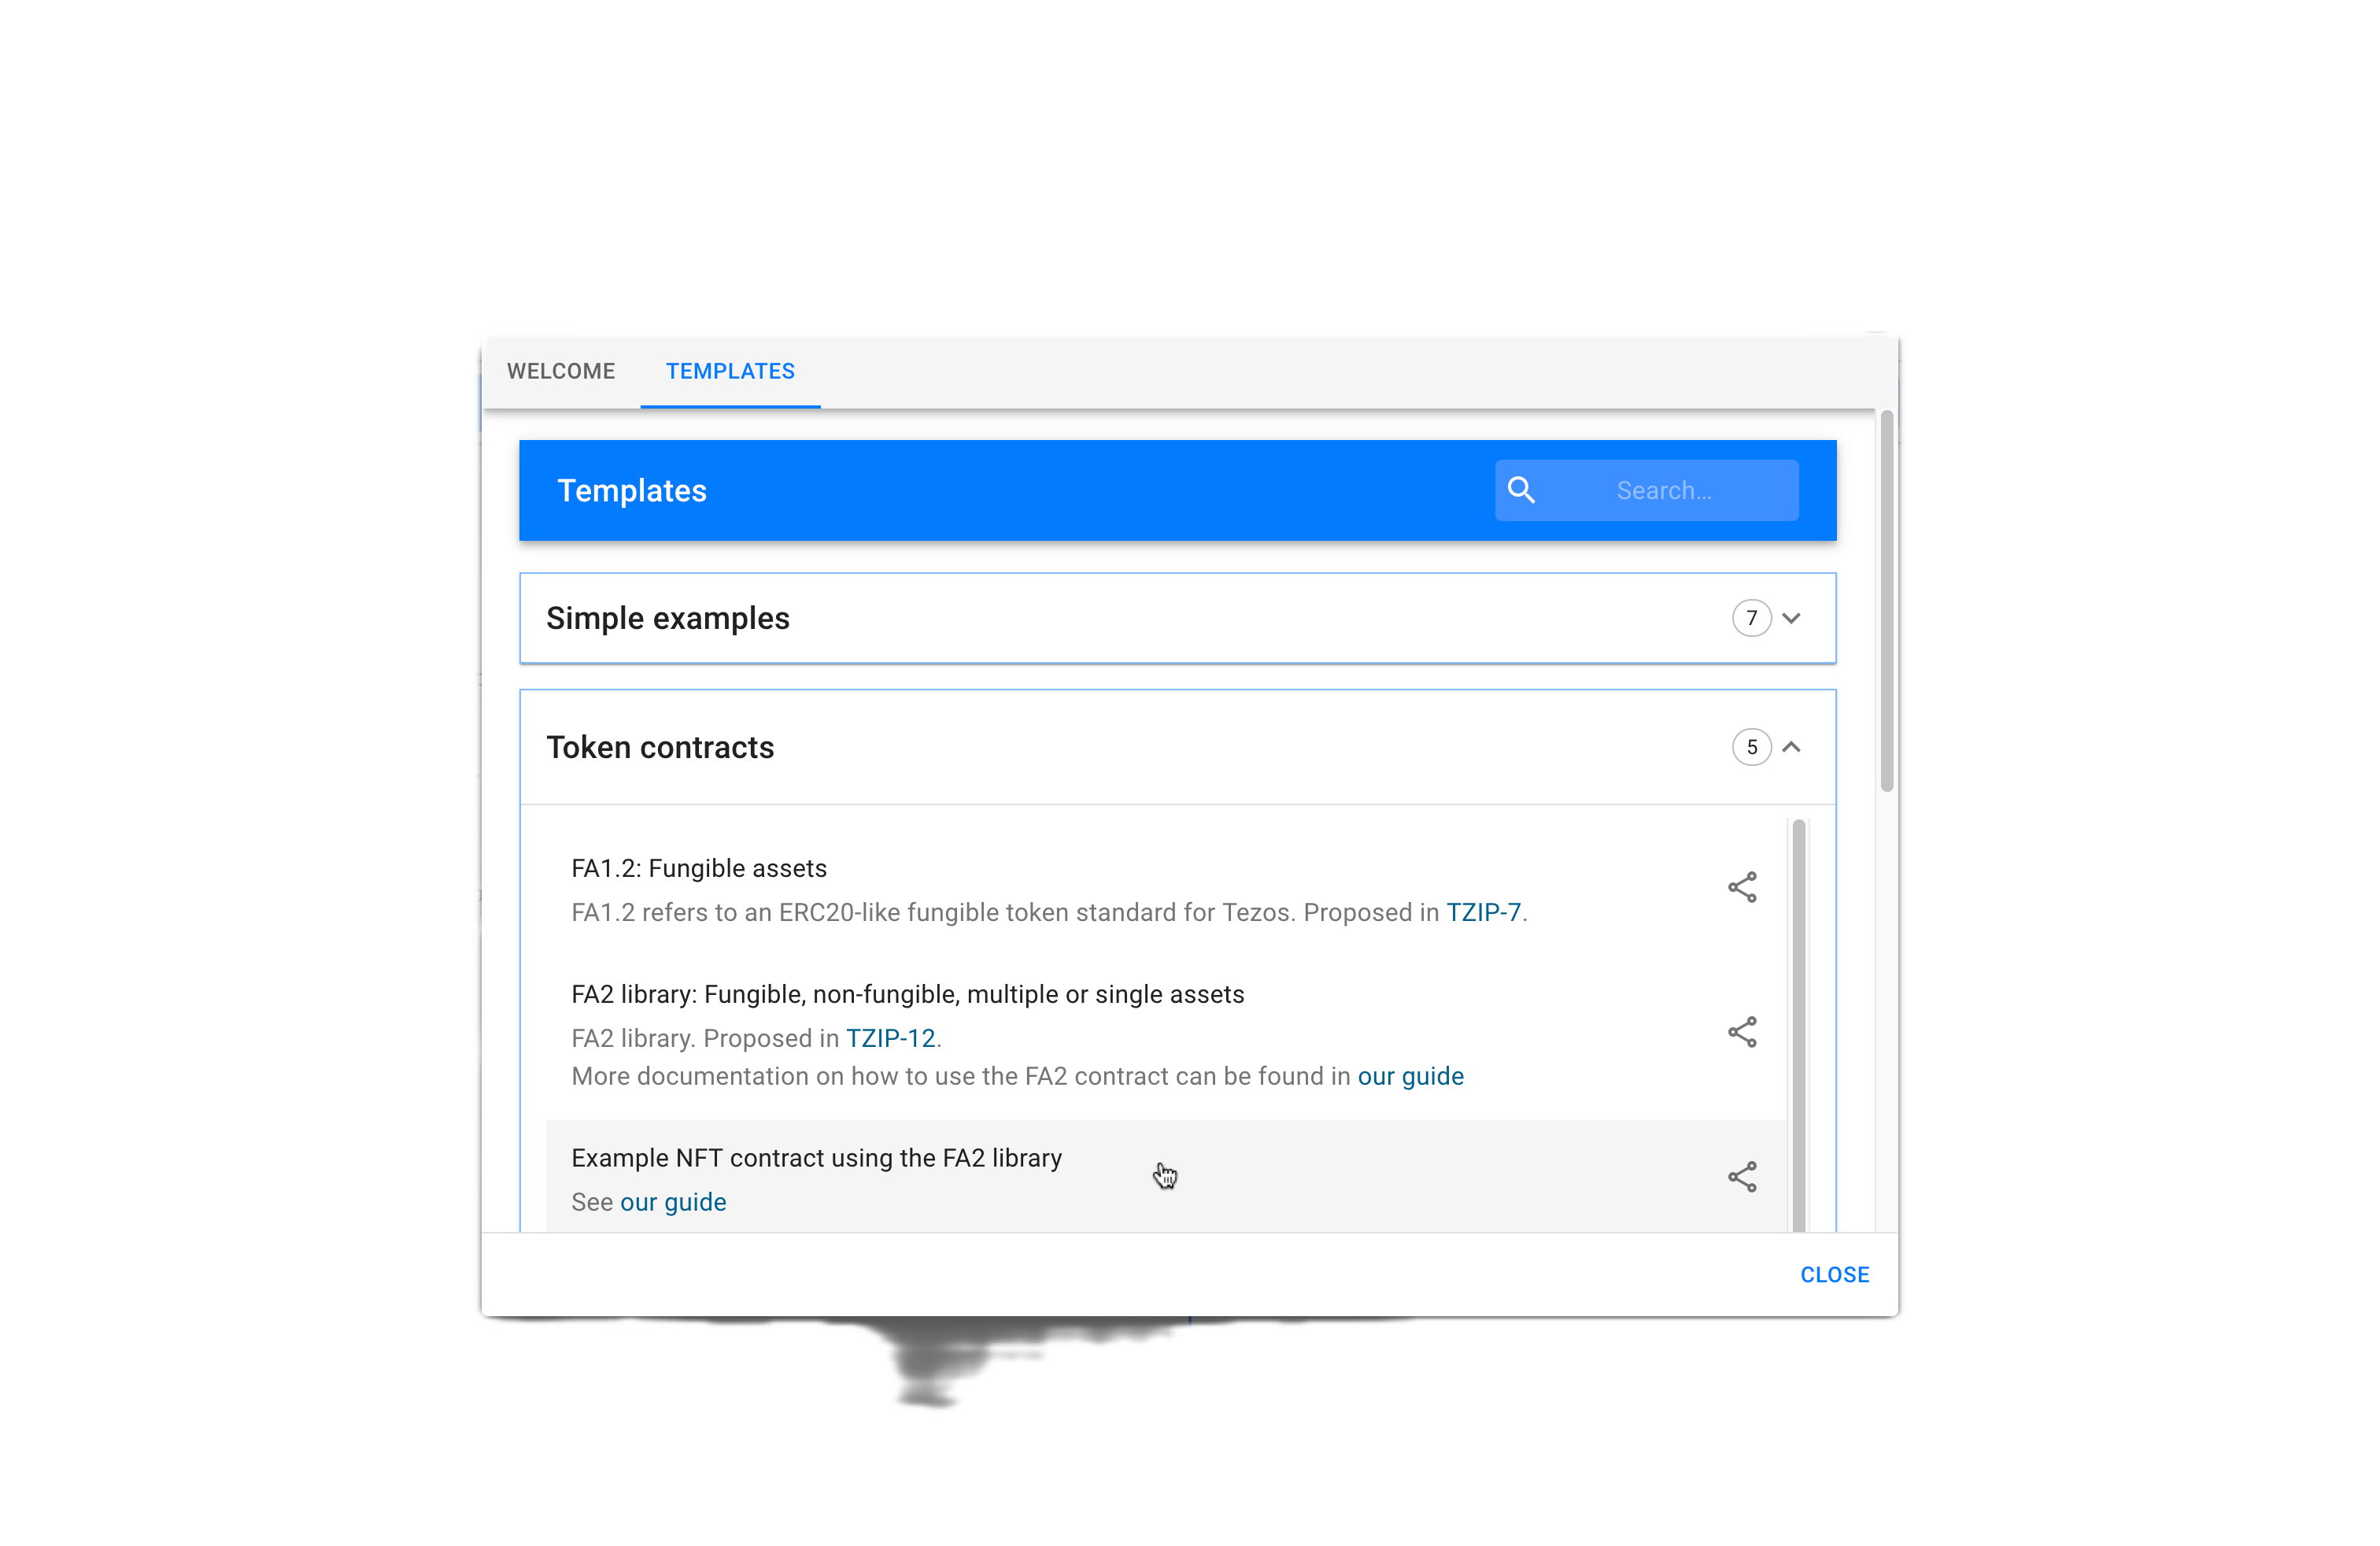
From the Welcome popup, go to the TEMPLATES tab, expand Token contracts and click the template named "Example NFT contract using the FA2 library."

If the Welcome popup doesn't appear, click the TEMPLATES button at the top right of the editor.
-
Specify a name for the new contract such as
fa2-nftand click IMPORT CONTRACT. The IDE loads the contract template in the editor.
The contract template
To use the SmartPy FA2 library in a contract, you create a contract like any other SmartPy contract. Then you import one base class from the library and as many mixins as you want.
-
Base classes provide the functionality for a single type of FA token:
main.Nft: Non-fungible tokens, which are unique digital assetsmain.Fungible: Fungible tokens, which are interchangeable assets, like tez or other cryptocurrenciesmain.SingleAsset: Single-asset tokens, which are a simplified case of fungible tokens, allowing only one token type per contract
-
Mixins provide additional features. Some of these mixins include:
main.Admin: Provides theis_administratormethod and theset_administratorentrypoint to control the administrator of the contract.main.BurnNft: Provides aburnentrypoint that destroys tokens.main.MintNft: Provides amintentrypoint that creates tokens. This mixin requires themain.Adminmixin and by default allows only the administrator to mint tokens.main.OnchainviewBalanceOf: Provides a view that returns information about who owns tokens.
For more information, see Base classes and Mixins.
Note the order of the base class and mixins; they must be imported and initialized in a specific order to work properly. There is information on the ordering in comments in the template and in the FA2 lib documentation. The main part of the contract template looks like this:
import smartpy as sp
from smartpy.templates import fa2_lib as fa2

# Main template for FA2 contracts
main = fa2.main


@sp.module
def my_module():
    import main

    # Order of inheritance: [Admin], [<policy>], <base class>, [<other mixins>].
    class MyNFTContract(
        main.Admin,
        main.Nft,
        main.MintNft,
        main.BurnNft,
        main.OnchainviewBalanceOf,
    ):
        def __init__(self, admin_address, contract_metadata, ledger, token_metadata):
            """Initializes the contract with NFT functionalities.
            The base class is required; all mixins are optional.
            The initialization must follow this order:

            - Other mixins such as OnchainviewBalanceOf, MintNFT, and BurnNFT
            - Base class: NFT
            - Transfer policy
            - Admin
            """

            # Initialize on-chain balance view
            main.OnchainviewBalanceOf.__init__(self)

            # Initialize the NFT-specific entrypoints
            main.BurnNft.__init__(self)
            main.MintNft.__init__(self)

            # Initialize the NFT base class
            main.Nft.__init__(self, contract_metadata, ledger, token_metadata)

            main.Admin.__init__(self, admin_address)
Customizing the contract template
You can customize the contract by using different a different base class, using different mixins, or overriding the entrypoints that the base class and mixins provide.
For example, the pre-deployed contract overrides the internal function is_administrator_.
The mint entrypoint uses this function to determine if an account can mint a token.
The overridden version always returns true, so anyone can mint a token:
# Override this function so anyone can mint for the purposes of the tutorial
@sp.private()
def is_administrator_(self):
    return True
You can omit this override to use the default behavior, but in this case you must set an administrator account when you deploy the contract or else you will not be able to mint any tokens. You could also implement other behavior such as providing a list of authorized accounts or requiring payment with the mint transaction.
Many token contracts change the metadata from the default, so in these steps you set up custom metadata for your tokens:
-
After the contract code but before the test code that begins with
@sp.add_test(), add a function to encode token metadata in the format that the contract stores it in:# Create token metadata
# Adapted from fa2.make_metadata
def create_metadata(symbol, name, decimals, displayUri, artifactUri, description, thumbnailUri):
return sp.map(
l={
"name": sp.scenario_utils.bytes_of_string(name),
"decimals": sp.scenario_utils.bytes_of_string("%d" % decimals),
"symbol": sp.scenario_utils.bytes_of_string(symbol),
"displayUri": sp.scenario_utils.bytes_of_string(displayUri),
"artifactUri": sp.scenario_utils.bytes_of_string(artifactUri),
"description": sp.scenario_utils.bytes_of_string(description),
"thumbnailUri": sp.scenario_utils.bytes_of_string(thumbnailUri),
}
)This function accepts metadata fields and encodes them as a may where the key is a string and the value is a series of bytes.
-
Optional: Customize the metadata by adding or removing fields.
Later you will change the web application to include this metadata in the mint transaction.
-
Update the metadata in the test to use this function by removing this code:
# Define initial token metadata and ownership
tok0_md = fa2.make_metadata(name="Token Zero", decimals=1, symbol="Tok0")
tok1_md = fa2.make_metadata(name="Token One", decimals=1, symbol="Tok1")
tok2_md = fa2.make_metadata(name="Token Two", decimals=1, symbol="Tok2")
token_metadata = [tok0_md, tok1_md, tok2_md]
ledger = {0: alice.address, 1: alice.address, 2: bob.address}
and replacing it with this code:
# Precreated image on IPFS
token_thumb_uri = "https://gateway.pinata.cloud/ipfs/QmRCp4Qc8afPrEqtM1YdRvNagWCsFGXHgGjbBYrmNsBkcE"

# Define initial token metadata and ownership
tok0_md = create_metadata(
        "Tok0",
        "Token Zero",
        0,
        token_thumb_uri,
        token_thumb_uri,
        "My first token",
        token_thumb_uri,
)
tok1_md = create_metadata(
        "Tok1",
        "Token One",
        0,
        token_thumb_uri,
        token_thumb_uri,
        "My second token",
        token_thumb_uri,
)
tok2_md = create_metadata(
        "Tok2",
        "Token Two",
        0,
        token_thumb_uri,
        token_thumb_uri,
        "My third token",
        token_thumb_uri,
)
token_metadata = [tok0_md, tok1_md, tok2_md]
ledger = {0: alice.address, 1: alice.address, 2: bob.address} -
Optional: Edit the metadata for these three tokens. You can change the names, symbols, and descriptions or replace the default picture with a picture of your own. Usually, developers store token media such as pictures with the InterPlanetary File System (IPFS) protocol using a tool such as Pinata.
-
Set yourself as the administrator of the contract:
-
Replace the line
admin = sp.test_account("Admin")with this line, using your address for<MY_ADDRESS>:admin = sp.address("<MY_ADDRESS>") -
Replace these lines:
contract = my_module.MyNFTContract(
    admin.address, sp.big_map(), ledger, token_metadata
)
with these lines:
contract = my_module.MyNFTContract(
    admin, sp.big_map(), ledger, token_metadata
)
-
-
Above the code of the contract, click Run Code to compile the contract and run the tests:

If you see an error, make sure that your code matches the completed contract file
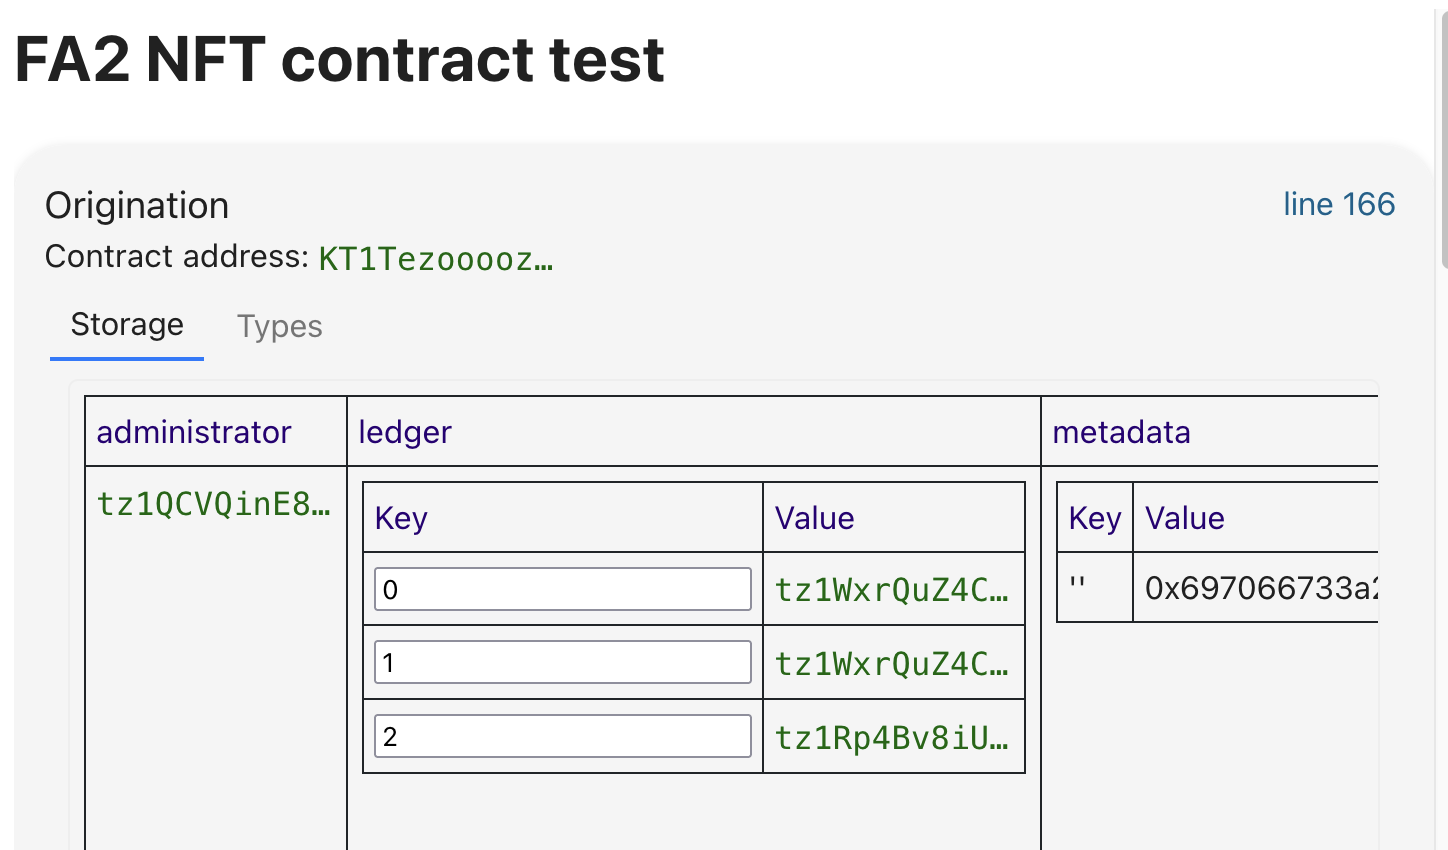
If the contract compiles and the tests pass, the IDE shows the starting value of the contract storage and the results of the tests in the right-hand pane:

This storage includes your address as the administrator and test account addresses as the starting token owners. Optionally, you can change the starting token owner address like you changed the admin address.
Deploying the contract
When you are satisfied with the contract and its tests, you can originate (deploy) it to the test network.
Originating the contract includes specifying the initial value for its storage. The IDE generates this value based on how you originated the contract in the tests. The tests used generated test accounts, so if you want to have control over the contract you must change the addresses in this generated storage value.
-
In the IDE, under the section that shows the origination storage values for the contract, click Deploy contract.
-
In the Michelson pop-up window, click Continue.
-
In the Direct Network Contract Origination window, under Node and Network, select the Ghostnet network.
-
In the Wallet section, connect your wallet.
-
Click ESTIMATE COST FROM RPC.
-
When you are ready to deploy the contract, go to the Deploy Contract section and click DEPLOY CONTRACT.
-
In the Pre-Signature Information window, click Accept.
-
Approve the transaction in your wallet.
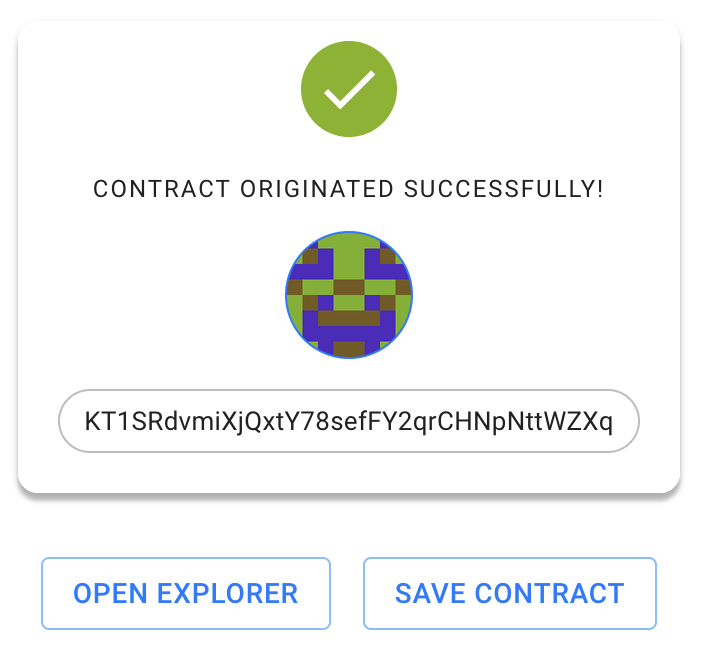
When the contract is deployed successfully, the page shows the new contract address under Origination Result, as in this picture:

-
Click OPEN EXPLORER to view the contract in the SmartPy block explorer. From this block explorer, you can click the links to see the contract in other block explorers.
-
Copy the address of the new contract.
Using the contract in your application
Now your contract is deployed and you can use it in the frontend application to create NFTs with it.
-
In your application's
App.sveltefile, update this line with the address of your deployed contract:const nftContractAddress = "KT1Lr8m7HgfY5UF6nXDDcXDxDgEmKyMeds1b"; -
If you changed the metadata by adding or removing fields, make updates in the file to change the token metadata to match. Remember that the format for metadata fields is a string and a sequence of bytes, as in the current code:
metadata.set("name", stringToBytes("My Token"));
metadata.set("symbol", stringToBytes("Tok"));
metadata.set("decimals", stringToBytes("0"));
metadata.set("artifactUri", stringToBytes(defaultImage));
metadata.set("displayUri", stringToBytes(defaultImage));
metadata.set("description", stringToBytes("A token I minted"));
metadata.set("thumbnailUri", stringToBytes(defaultImage)); -
Restart the web application and mint tokens with it from your administrator account. The web application creates the NFTs on your new contract just like it did on the prebuilt contract. You can use the address of the contract or the link in the log to look them up on a block explorer.
In the next section you use Taquito to retrieve information about your tokens from the contract and show them on the web application.